How may we help you?
EnergyGigs Tutorials
Tutorial – Setting Up Your Candidate Profile
EnergyGigs
Tutorial – Setting Up Interviews
EnergyGigs
Tutorial – Finding Projects
EnergyGigs
Tutorial – On Platform Reviews
EnergyGigs
Tutorial – Signing in to Your Company Account
EnergyGigs
Tutorial – Setting Millstones and Payments as a Company
EnergyGigs
FAQS
Learn everything you need to know about completing and optimizing your profile, bidding on projects, and accessing the best plans and tools to get your work done and get paid.
What is EnergyGigs?
EnergyGigs is a versatile freelancing platform, offering a space where individuals and businesses alike can post projects and job listings while also connecting with skilled professionals for hire. With a diverse pool of candidates boasting expertise in various areas of the every industry, clients have the opportunity to choose from a range of skilled staff to fulfill their project needs. Whether it’s energy sector, technology industry, or any other industry, EnergyGigs aims to provide a seamless experience for both employers seeking talented individuals and freelancers looking for opportunities.
Tips for new freelancers
Once you’ve signed up to platform, take some time to complete your profile. Add details about your skills, experience, education, and any certifications you might have. A complete profile increases your chances of getting hired.
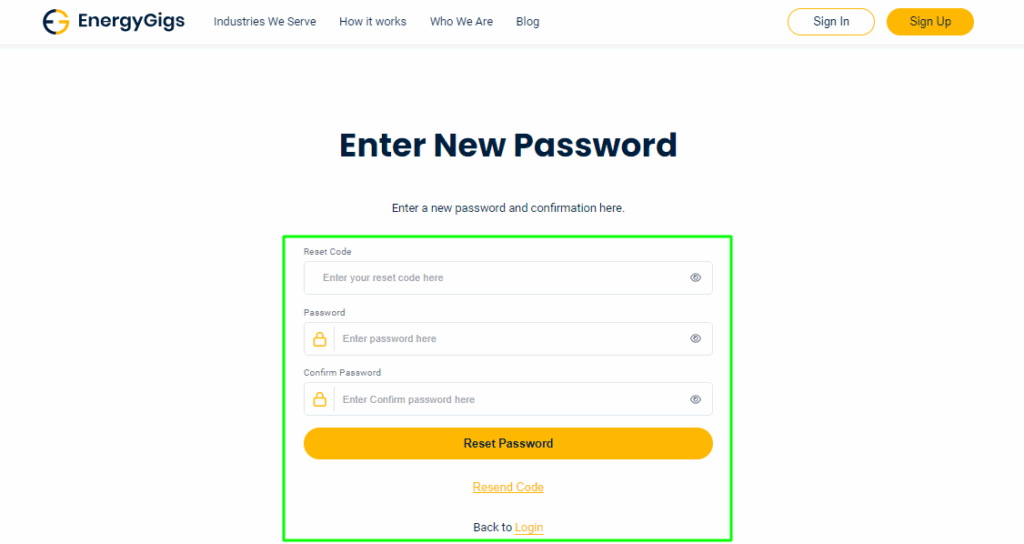
I forgot my password
If you’ve forgotten your password on EnergyGigs, don’t worry, it happens! Here’s what you can do to reset it:
- Password Reset Link: Visit the https://energygigs.com/ website and click on Sign In button. There you can see “Reset Password” option. Click on it.
- Email Verification: EnergyGigs will typically ask you to provide the email address associated with your account. Enter your email address and submit the form.
- Check Your Email: EnergyGigs will send you a reset password code. Copy this code and paste it on reset password screen
- Reset Your Password: Enter the code you received in the email and set your new password, make sure it’s strong and secure. Use a combination of letters, numbers, and special characters to enhance security.
- Confirm Password Change: After setting your new password, log in to your EnergyGigs account using your email address and the new password you just created.
If you’re still having trouble resetting your password, you can reach out to EnergyGigs’ customer support for further assistance. They should be able to help you regain access to your account.
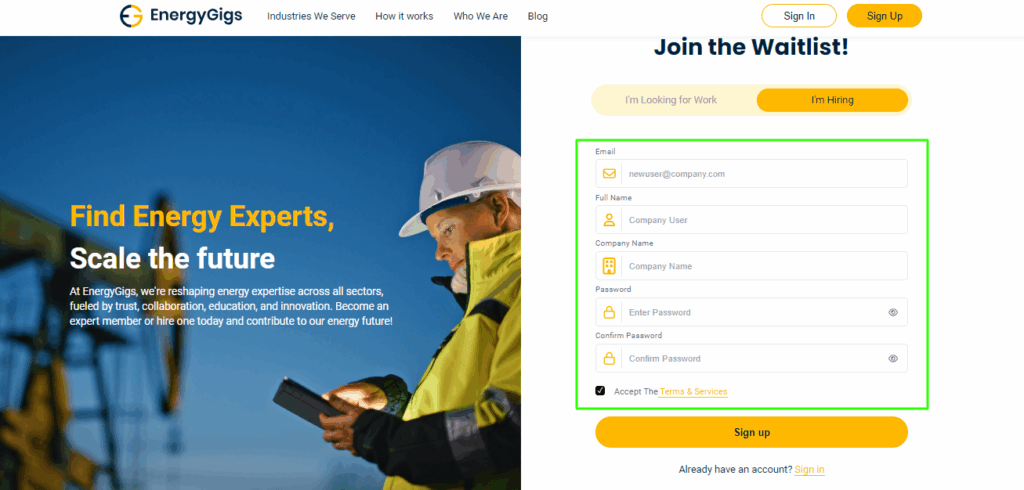
Register as a Company
To register as a Company user on EnergyGigs.com, the process begins by navigating to the signup page at https://energygigs.com/signup. Here, you’re prompted to provide essential details such as your email address, full name, company name, and select a password. Once these fields are completed, you’ll need to agree to the platform’s Terms & Conditions before proceeding further. Upon acceptance, clicking the prominent yellow “Sign Up” button initiates your onboarding process.
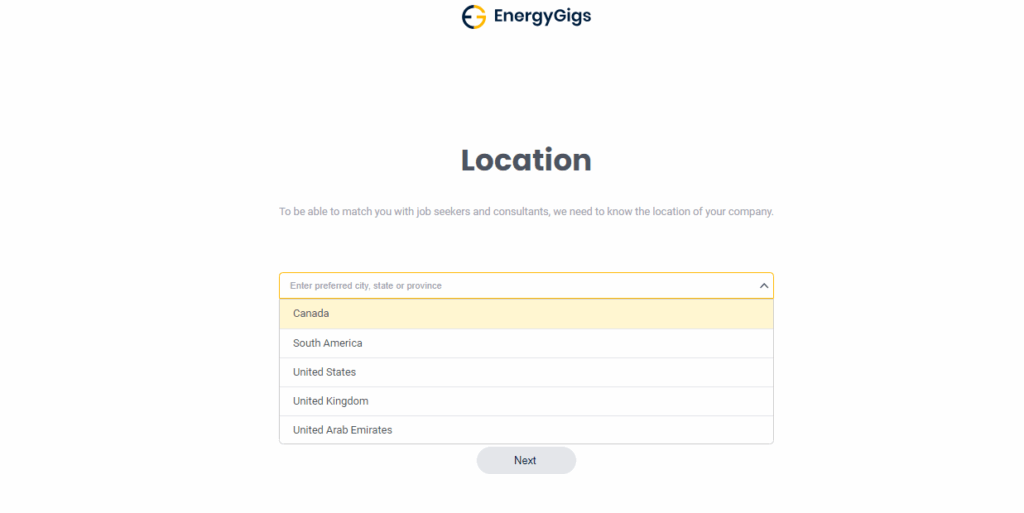
Following successful signup, the next step involves specifying your company’s location. You’re prompted to choose from available options and then click the “Next” button to proceed.
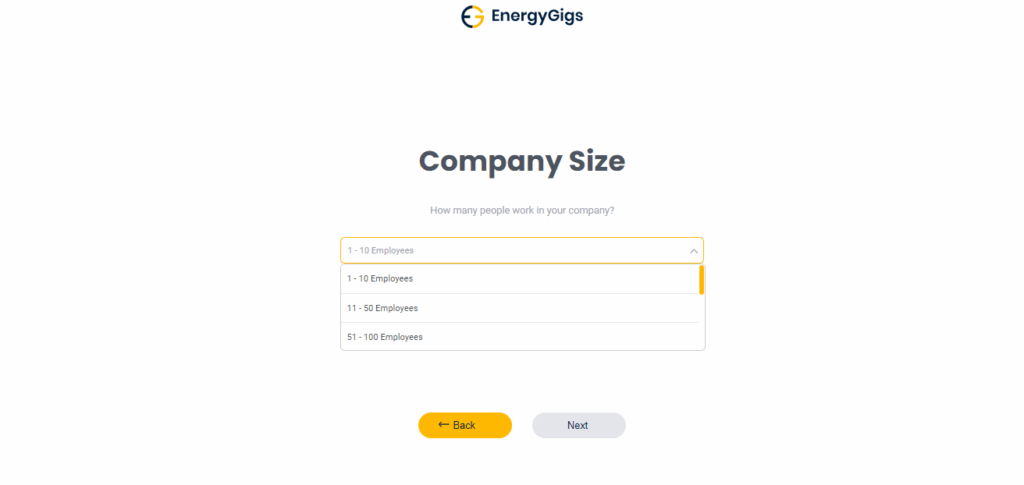
Subsequently, you’ll be asked to indicate your company’s size, likely through options provided by the platform. Once again, clicking “Next” advances you to the next stage of onboarding.
On the subsequent page, you’re prompted to select the industries your company operates within. After making your selections, you can proceed by clicking the “Next” button.

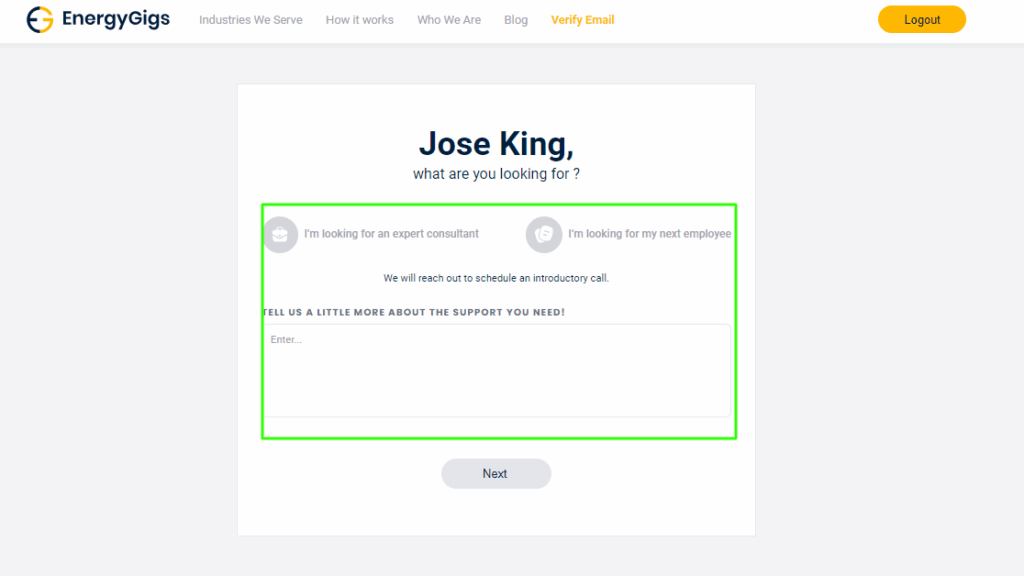
Upon completing the initial onboarding steps, you’ll arrive at the waitlist page. Here, you have the opportunity to specify the type of candidate you’re looking to hire and any specific requirements you may have. This information allows the EnergyGigs team to better understand your recruitment needs and potentially refer suitable candidates to your company.
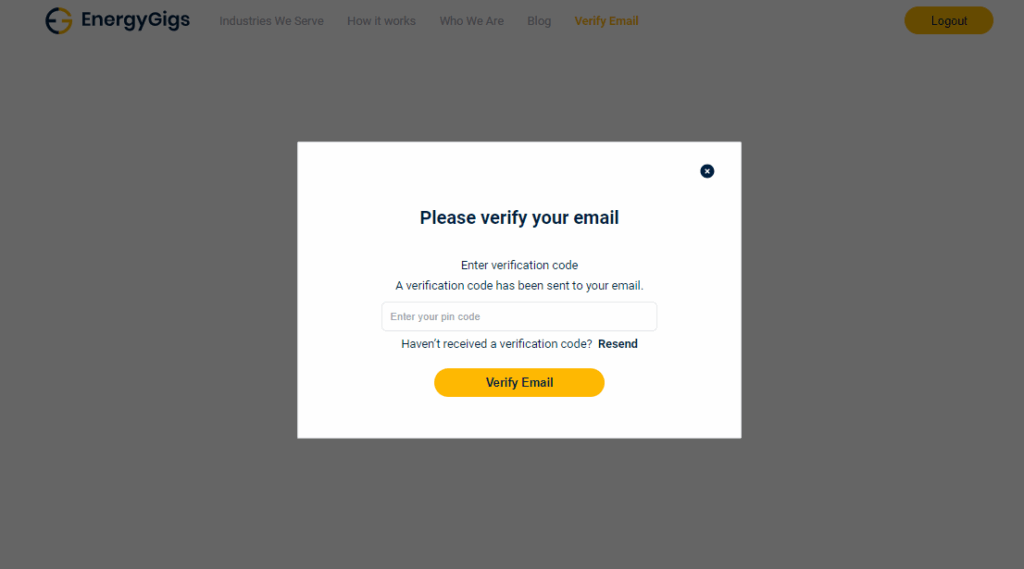
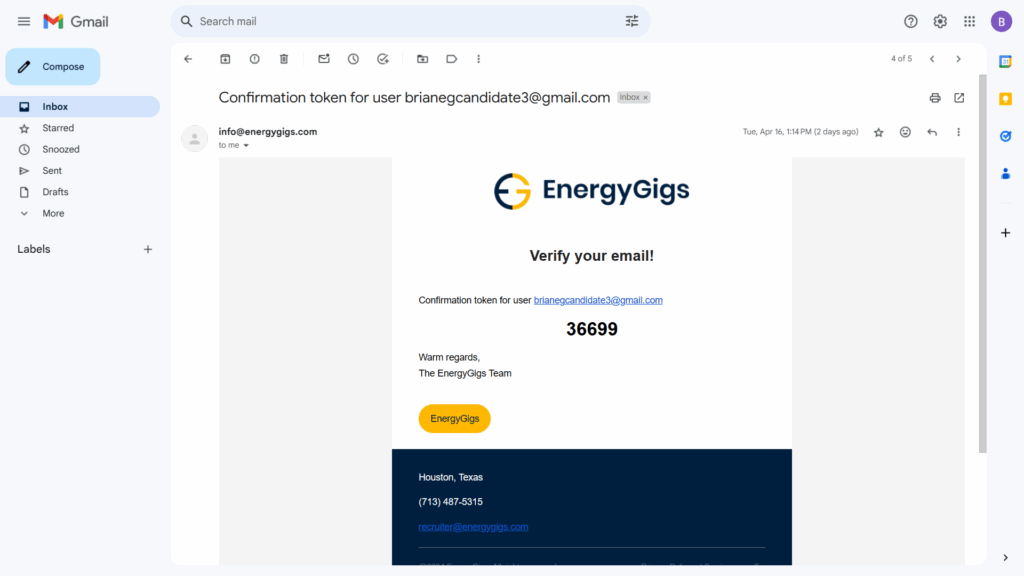
Before gaining full access to the platform, you’ll need to verify your email address. A verification code will be sent to the email provided during signup. Once received, enter the code to confirm your email and validate your account.
Following email verification, you’ll be placed on the waitlist for review by the EnergyGigs team. They’ll assess your profile and, upon approval, grant you access to the platform.
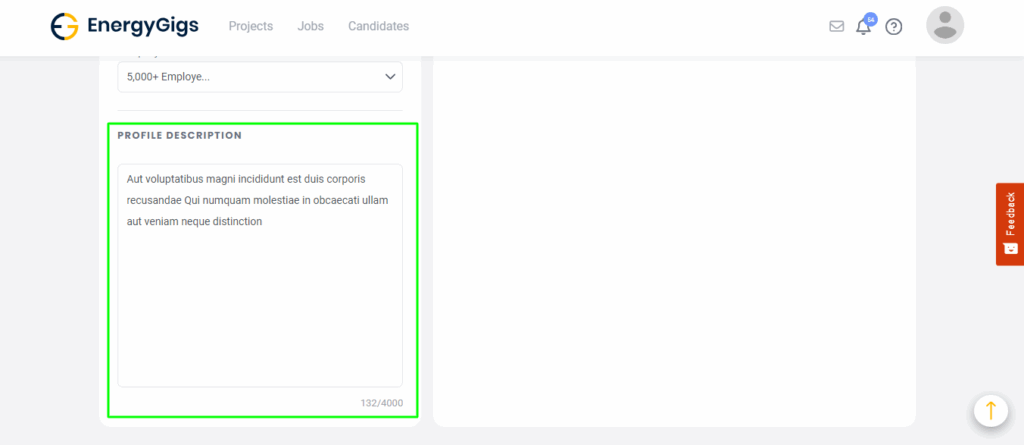
Completing Company Profile
To complete your company profile on EnergyGigs.com, start by uploading your company logo next to the Company Name field
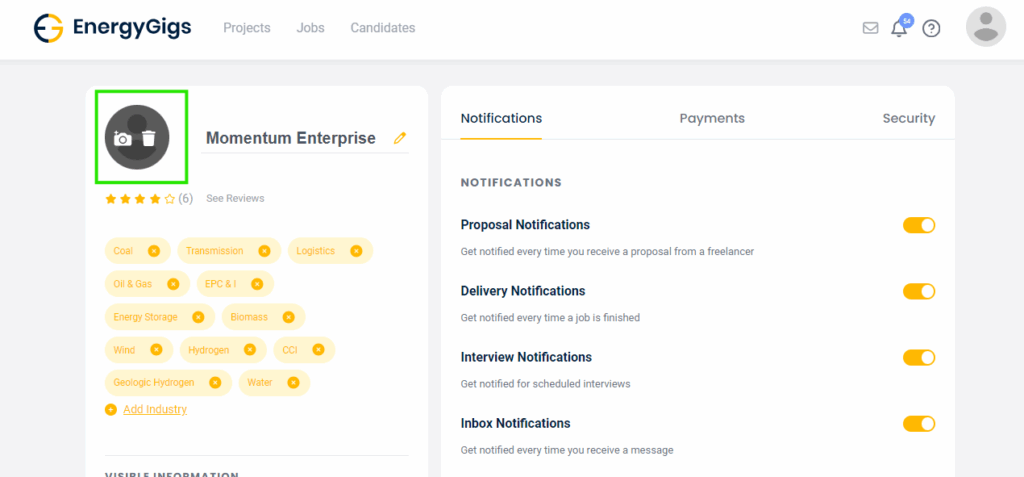
Once the logo is uploaded, proceed to the Profile Description section and craft a brief yet informative description of your company, including its mission, values, products, and services. Ensure that the description accurately represents your brand identity and offerings. Once satisfied with the content, save your changes to finalize your company profile. This step enhances your company’s visibility and credibility on the platform, making it more appealing to potential candidates, clients, and partners within the energy industry.
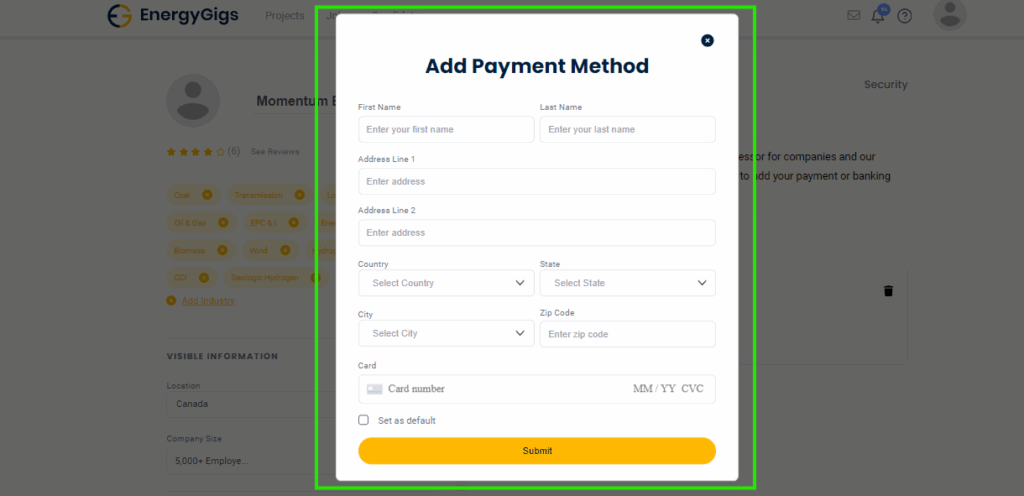
Setup Payment Method
To manage payment methods on EnergyGigs.com, navigate to the Profile section and select the Payments tab. Here, you’ll find the option to add a new payment method by clicking on the “Add Payment Method” button. Fill out the required fields, including your full name, last name, address, country, state, city, and zip code. Additionally, input your card details, including the card number, expiry date, and CVC code for security purposes. Once all information is entered, you can opt to set this payment method as default for future transactions. Finally, review the details for accuracy and click the Submit button to save your payment method. This ensures seamless and secure transactions for any services or subscriptions on the platform.
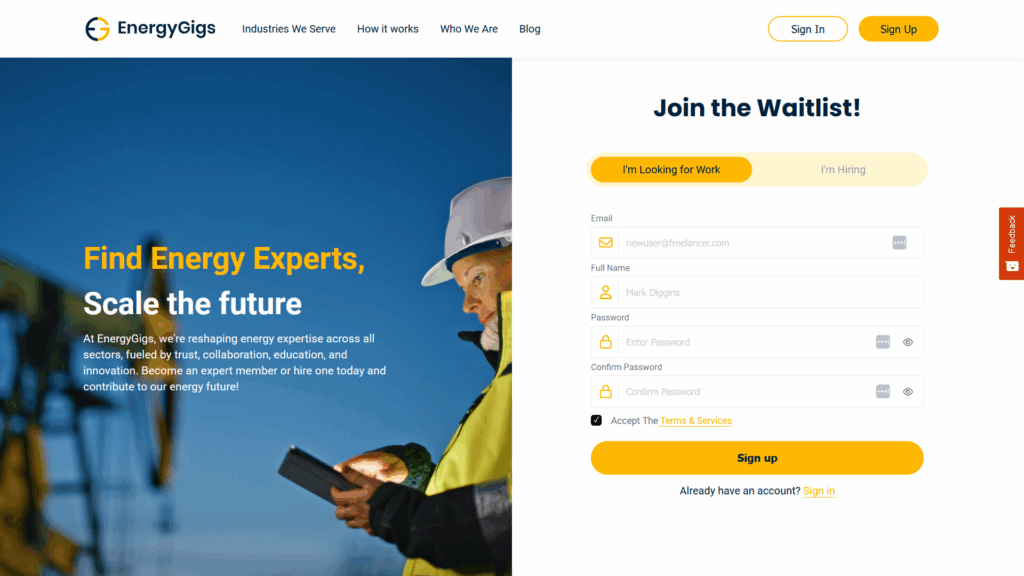
Register as Freelancer
Register as Freelancer Visit the Website: Go to EnergyGigs.com in your web browser. Sign Up or Register: Look for a “Sign Up” button on the homepage. Click on it to begin the registration process. Enter your email, full name and password.
Complete Freelancer Profile
- Upload profile picture: Adding a professional profile picture can help clients connect with you more easily.
- After account verification, user will be redirected to their profile page. On this page the user will be required to complete their profile by filling out the different categories such as: name, title, profile category, country location, resume, language, work location & profile description on the left column.
- The right column contains five tabs named: general, experience, education, payments & settings.
- In the general tab the following fields must be filled: Industries, skills, job seeker, salary expectation, freelancer & freelancer profile rate.
- User is required to add their experience in the experience tab.
- User is required to add their education in the education tab.
- Payments tab requires the user to enter their stripe account information and complete the stripe to energygigs account connection.
- The settings tab contains the login and notification settings. This section also allows the user to change their email address and password.
Verify your account
Upon signing up go to your email and copy the verification code and enter it in the pop up window on the energygigs website.
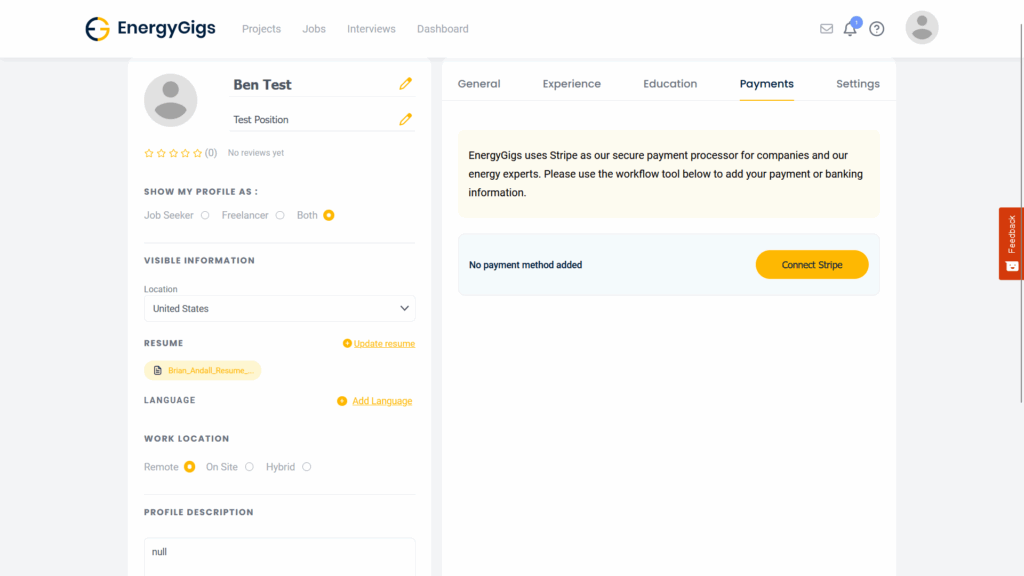
Payments Tab
Payments tab requires the user to enter their stripe account information and complete the stripe to energygigs account connection.
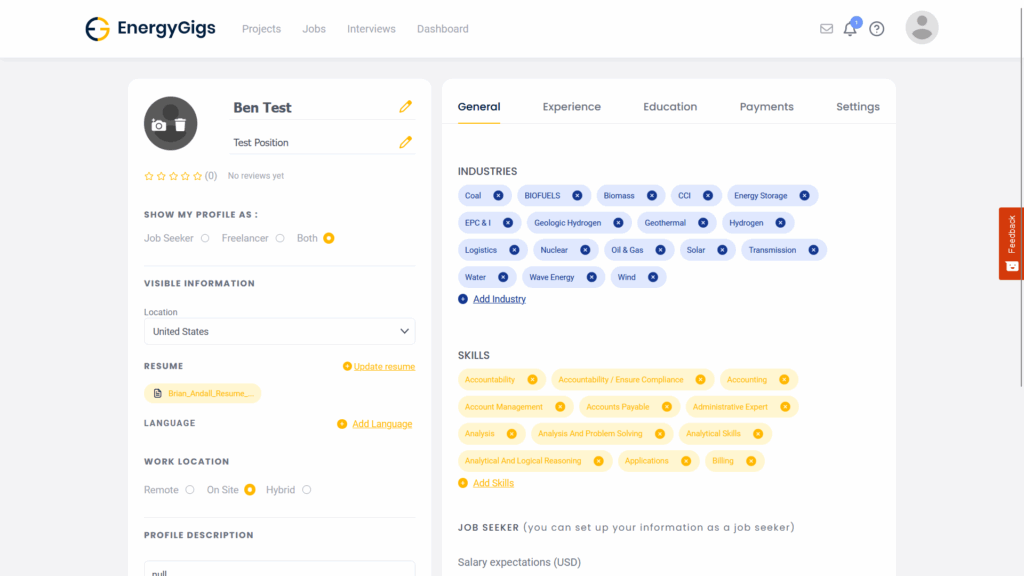
Add Profile Picture
Adding a professional profile picture can help clients connect with you more easily. place mouse over the person icon on the top left of the page and click on the camera icon to add profile picture.
Freelancer Profile Setup (Left Column)
On this page the user will be required to complete their profile by filling out the different categories such as: name, title, profile category, country location, resume, language, work location & profile description on the left column.
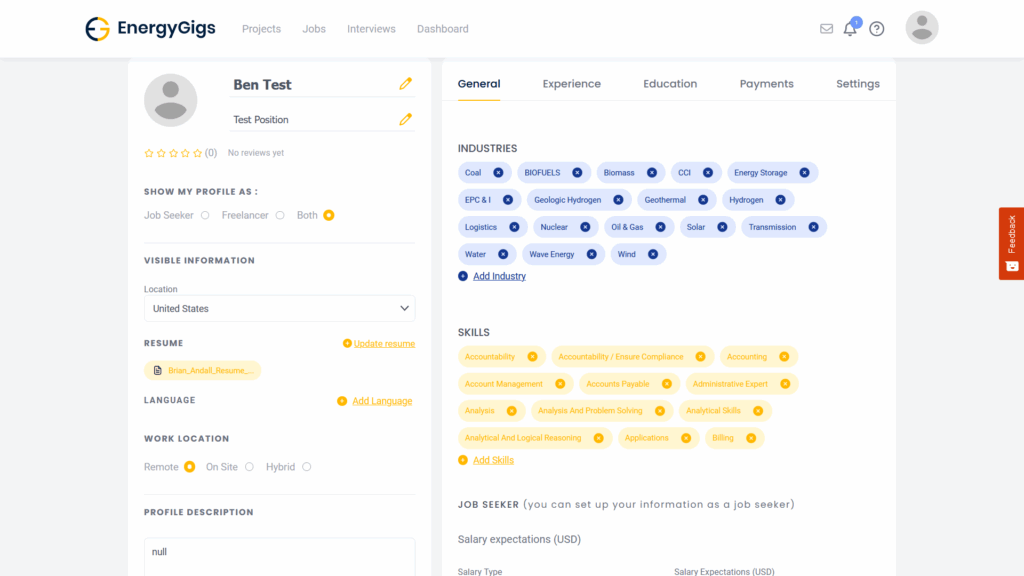
Freelancer Profile Setup (Right Column)
The right column contains five tabs named: general, experience, education, payments & settings. In the general tab the following fields must be filled: Industries, skills, job seeker, salary expectation, freelancer & freelancer profile rate.

Freelancer Work Experience?
User is required to add their work experience in the experience tab. The freelancer is required to add prior work experience details such as: job title, company name, description, start date, end date, industry and skills.

Freelancer Education?
User is required to add their education in the education tab. Education details required include: School, Degree, Education Level, Start and end date.

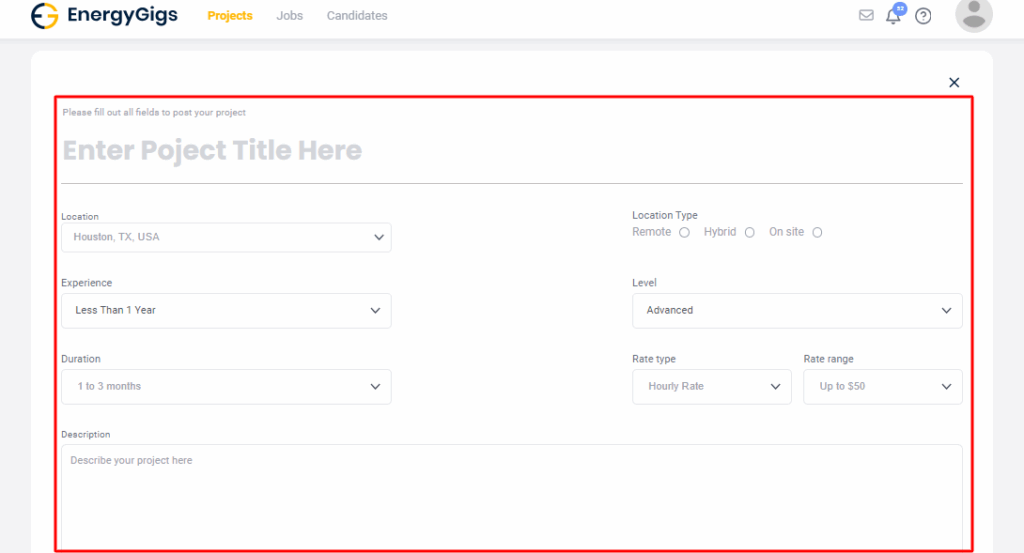
Posting a Project
To initiate the creation of a new project on EnergyGigs.com, first, navigate to the Projects page and locate the “Create Project” button. Clicking on this button will redirect you to the Create Project page. Here, you’ll begin by entering the project title and selecting the location and location type where the project will be based. Next, specify the desired years of experience, level of expertise, project duration, rate type, and the corresponding amount.
Once the project details are filled out, proceed to add a comprehensive description outlining the specifics and requirements of the project that your company intends to hire for. This description should encompass key details such as project objectives, deliverables, timelines, and any essential qualifications or skills required from potential candidates.
After crafting the project description, it’s time to select the relevant industries and skills associated with the project. This step ensures that your project is accurately categorized and targeted towards professionals with the appropriate expertise.
Finally, click on the “Post Project” button to publish your project on the platform. Upon submission, you’ll observe a confirmation modal indicating that the project has been successfully posted, confirming its visibility to potential candidates and enabling them to apply accordingly.
View Applicants applied for project
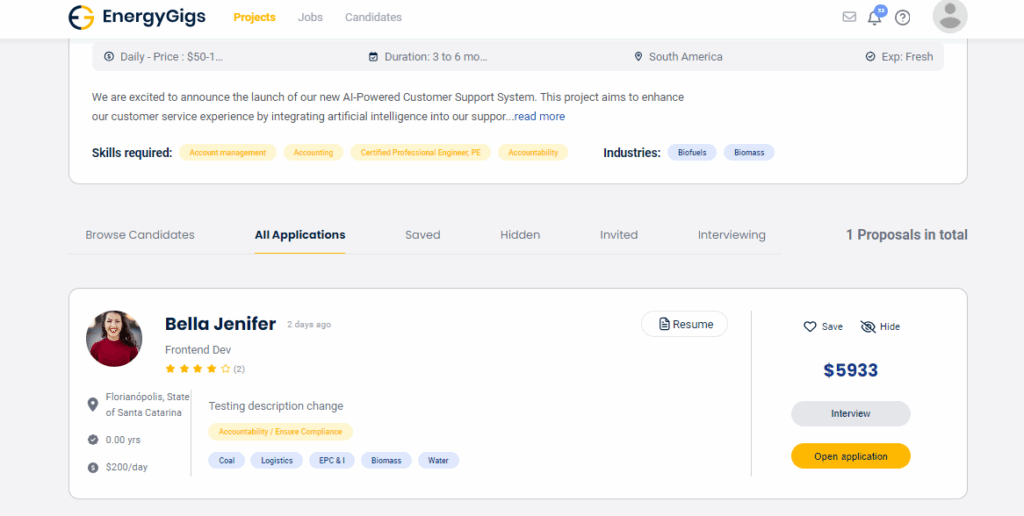
To access the project details and view applicants on EnergyGigs.com, start by navigating to the Projects page. Once there, locate the posted project card on the Kanban board representing the project of interest. Click on the card, and it will seamlessly navigate you to the project details page. Here, you’ll find comprehensive information about the project, including its description, requirements, and status.
Under the “All Applicants” tab on the project details page, you’ll find a list of all the candidates who have applied for the project. This section provides valuable insight into the pool of applicants interested in the project, allowing you to review their profiles, qualifications, and any additional information they’ve provided. From here, you can manage applicant communication, schedule interviews, and ultimately select the most suitable candidates for the project.
Invite Candidate to a Project
To navigate to the project details page from the Projects page, simply click on the posted project card displayed on the Kanban board. This action will seamlessly direct you to the project details page, where you can find comprehensive information about the project.
Once on the project details page, navigate to the Browse Candidates tab. Here, you can browse through a list of available freelancers who match the project requirements. Choose any freelancer from the list and click on the “Invite” button associated with their profile.
Upon clicking the “Invite” button, the invite will be sent successfully to the selected candidate. You’ll also notice that the candidate’s card appears under the Invited tab, indicating that they have been invited to apply for the project. .
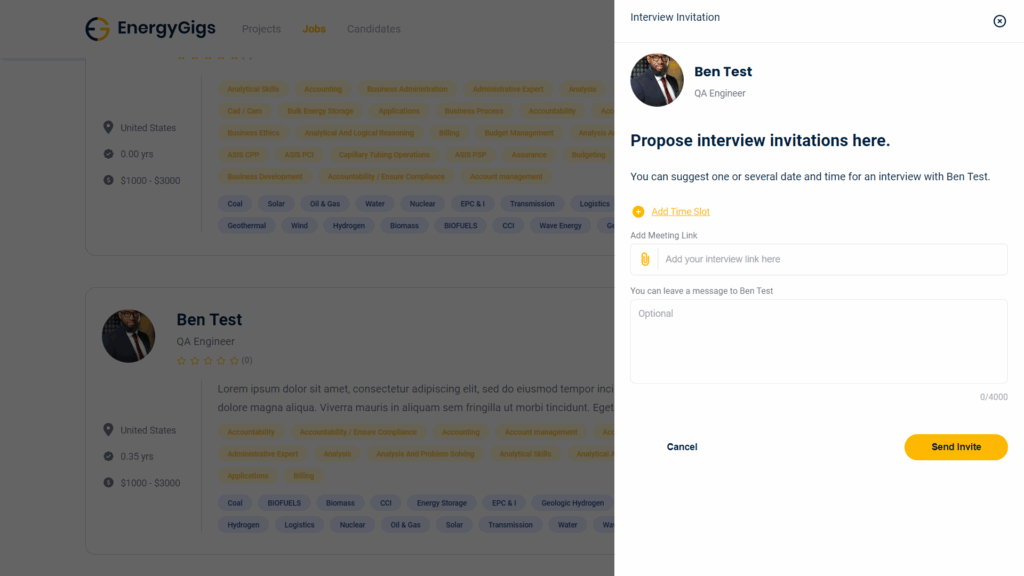
Scheduling Interviews
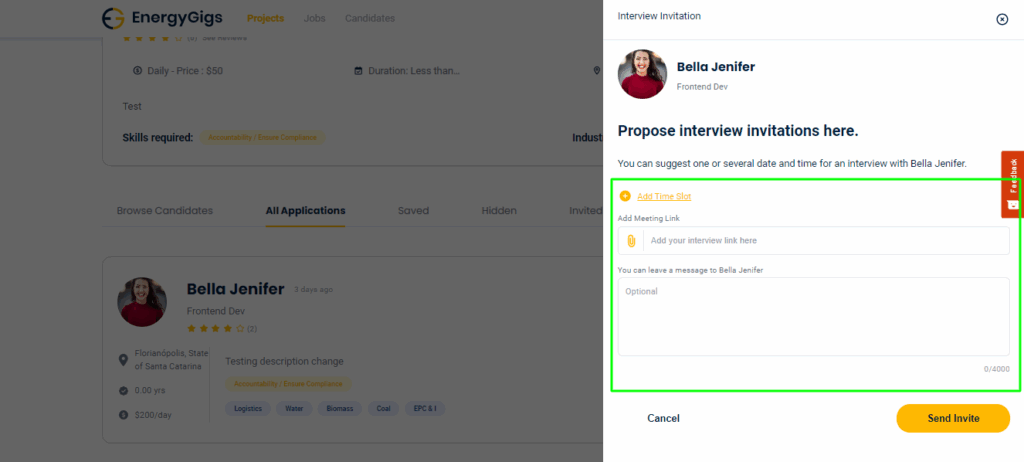
To initiate an interview process for a candidate on EnergyGigs.com, first, navigate to the Projects board and select a specific project. Once on the project details page, you’ll find a list of applicants who have applied for the project. Choose a candidate from the list and click on their profile. From there, locate the “Interview” button and click on it.
Upon clicking, you’ll be directed to schedule the interview by selecting a suitable date and time. You have the option to add multiple time slots if needed. Additionally, provide the meeting link and any relevant notes for the candidate. Once all details are entered, click on the “Send Invite” button to dispatch the interview invitation to the candidate.
Upon sending the invite, the candidate will receive the invitation and have the option to confirm. Once the candidate accepts the interview request, you will receive a notification confirming their acceptance. The selected date and time for the interview will then appear in the Interview sidebar, streamlining the scheduling process and ensuring effective communication between you and the candidate throughout the interview process.
What is a Project Milestone
A project milestone is a significant event or point in time within a project that marks the completion of a major phase, achievement of a key deliverable, or some other significant stage. Milestones are used to monitor the progress of a project and to provide a clear point of reference for assessing how well the project is progressing according to its schedule and objectives.
Project Processing Fee
Energy Gigs charges at 25% processing fee for every project milestone that is successfully submitted and completed on the platform.
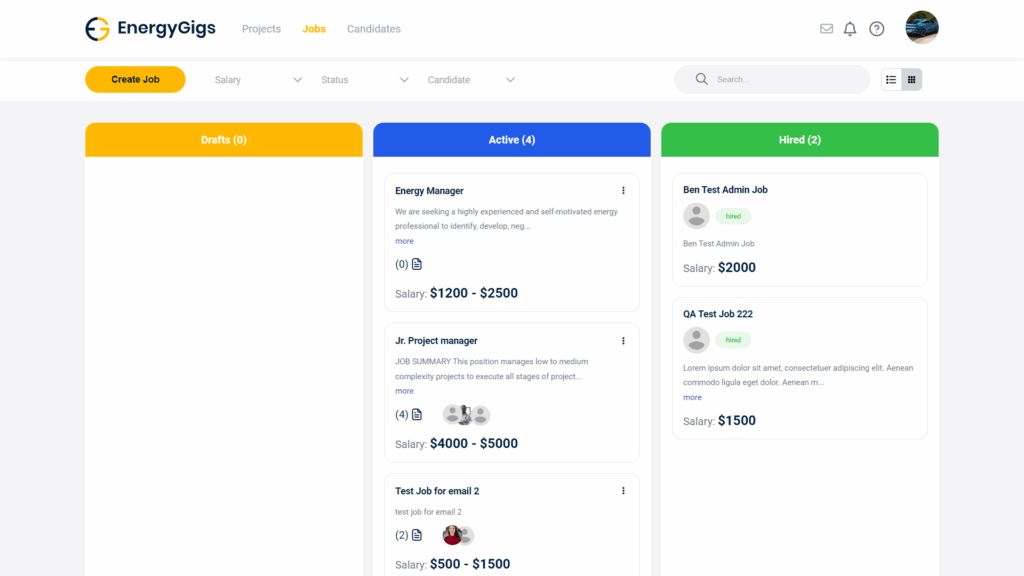
Posting a Job
- On the company profile, navigate to the job webpage: https://energygigs.com/company/jobs
- click “Create Job”
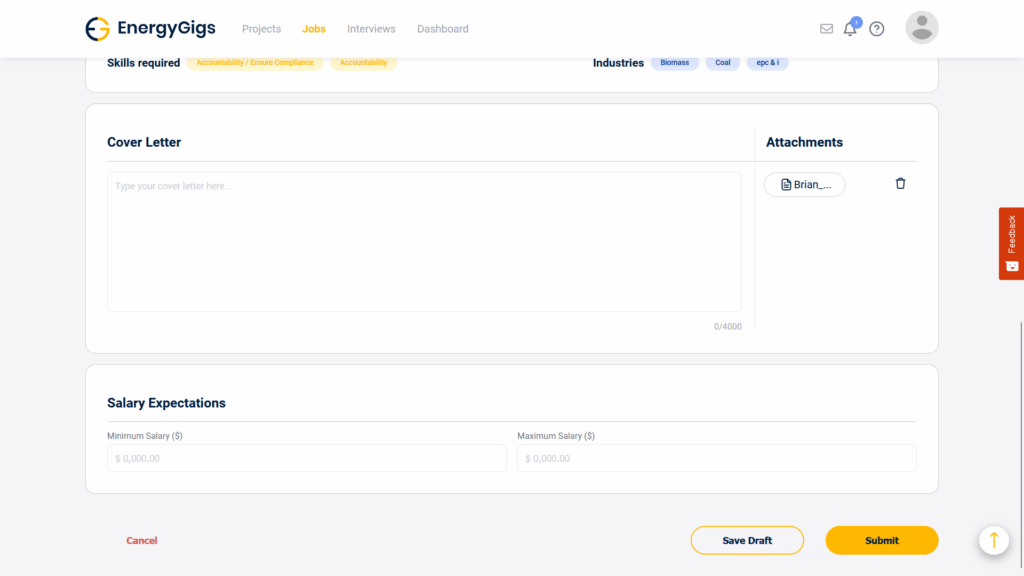
Applying to a Job
- Navigate to Jobs to browser through available jobs on the website https://energygigs.com/user/jobs
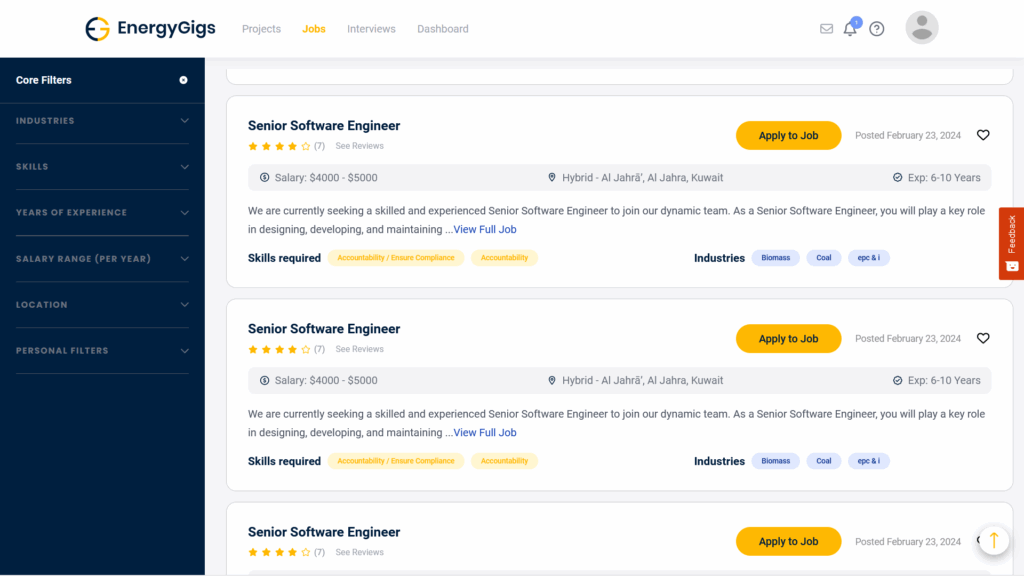
- Review Job Details: Click on a job that interests you to view its details. Make sure to carefully read the job description, requirements, and any other relevant information provided by the client.

- Resume is automatically attached from the profile.
- Freelancer is required to enter a cover letter while applying to job
- Freelancer is required to enter salary expectation range between a minimum and maximum expected salary amount.
- Freelancer can click “submit” to submit application
Job Interview
- Upon applying for a job, the candidate can be selected to be interviewed for a job process.
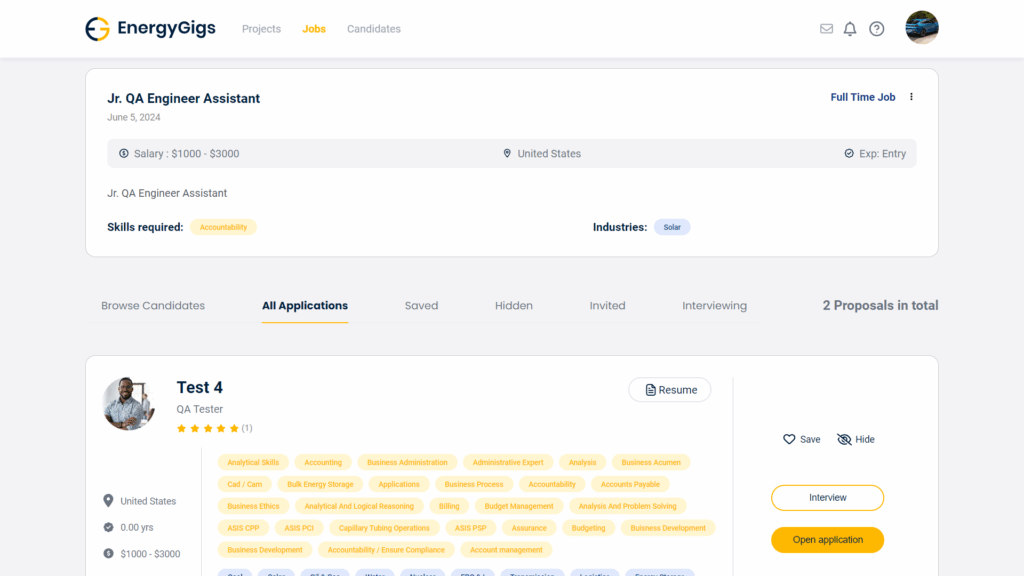
- Company user should browse through multiple candidates & select the best fit.
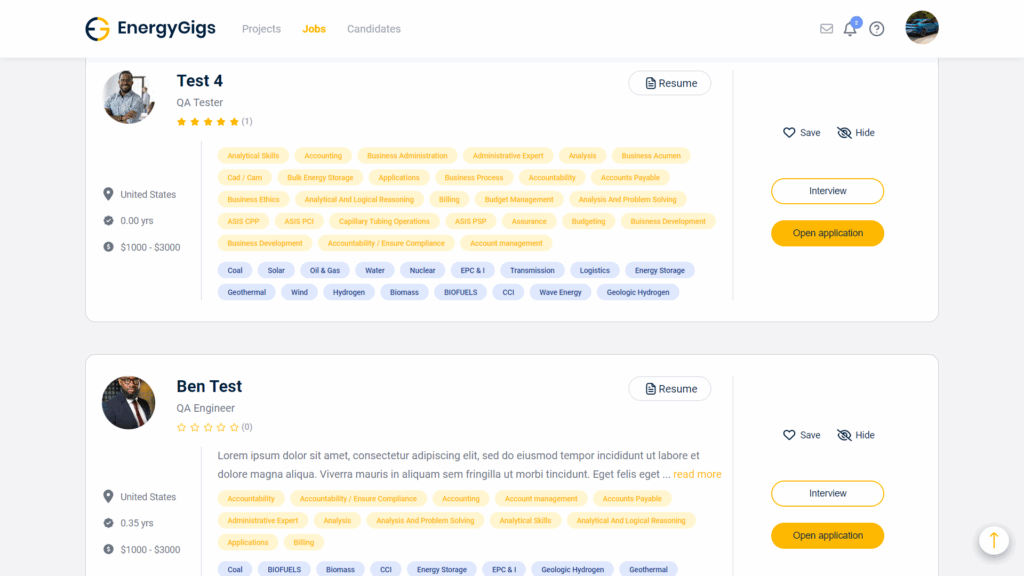
- Applicant interview can be viewed by clicking on “Open Application”
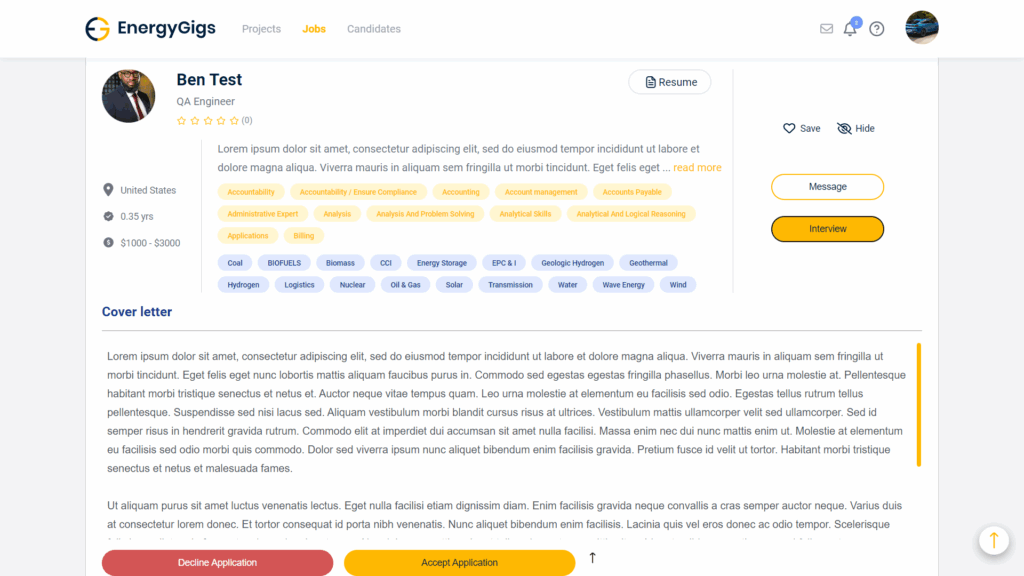
- Click “Interview”
- Add interview “time slot”
- Add “Meeting Link”
- Add message to interview candidate.
- click send invite